

Installing Queens

Installing Queens - Methods Explained
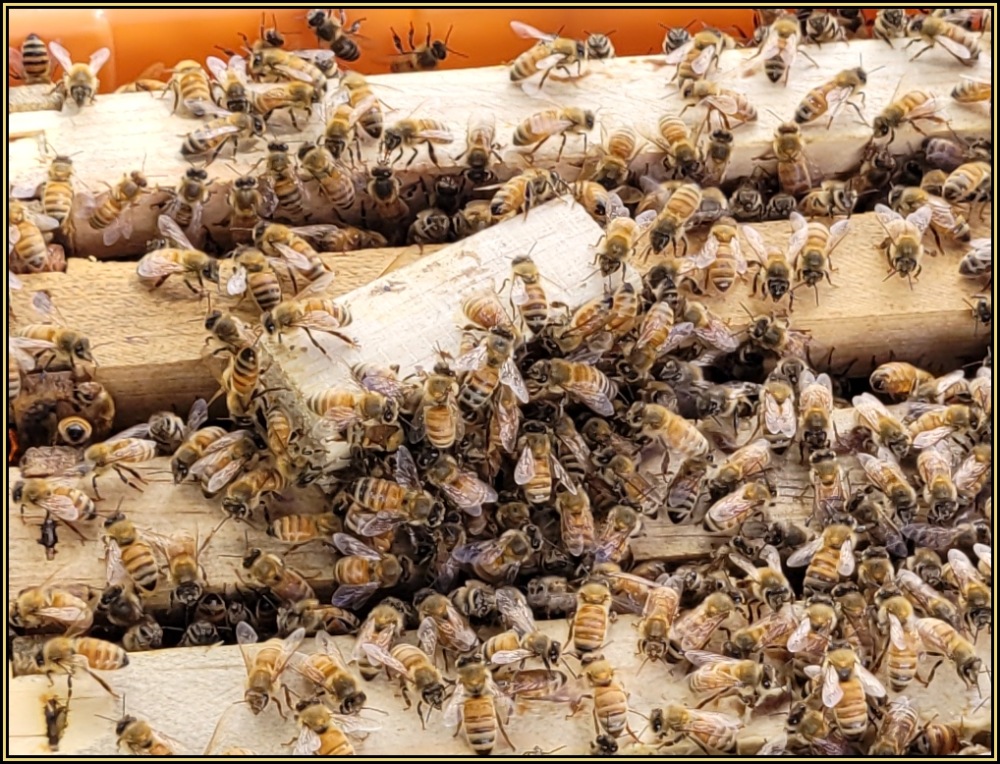
These bees are ready for a new Queen
Notice how the bees are behaving towards the queen in the JZ-BZ plastic cage and attempting to feed her through the narrow openings verses attempting to sting her or completely ignoring her. This is a sign they are happy to find the arrival of a "new mother". Perhaps they instinctively know the day is saved and all will be well in their, about to be "queen-right", world. The colony will survive now and they can all relax and settle down.
Methods of Introduction
There are a few simple rules to follow to increase the acceptance rate.
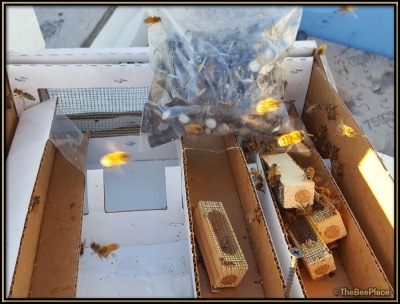
Queens are shipped in cages that have a removable cork covering the exit hole(s). The beekeeper can leave the cork and preform a manual release, or for use the more common automatic release method, we use candy tubes and allow the bees to do the work.
The cork can be replaced with a small straw-like tube filled with a semi-hard "queen candy," a mix of powdered sugar and syrup or honey. As the bees consume this candy, the queen is eventually able to exit the cage and enter the hive.
The bees eat the candy because it is a form of food and they like it—not because they understand the outcome. This slow release allows the colony time to adjust to her presence. (more on this below)
This process typically takes a couple of days, depending on colony strength and conditions, but normally works very well when a few basic guidelines are followed.
Even gentle colonies can become unsettled when queenless, but most will accept a new queen using the standard 24–72 hour introduction period. More defensive colonies may require additional consideration, so evaluating temperament can help determine the best approach.
Rules of the road for introducing a new queen:
- First, make sure the hive is queenless for at least 24 hours.
- This improves acceptance of the new queen.
- Second, position the queen cage so worker bees can access and care for her.
- They need to feed and hydrate her during the introduction period.
- Third, return in about three to four days to confirm she has been released.
- If she has not been released, she can be manually released if the bees are showing acceptance behavior.
The bees will show subtle signs that indicate their readiness. The video above shows the behavior displayed when a colony accepts a new queen.

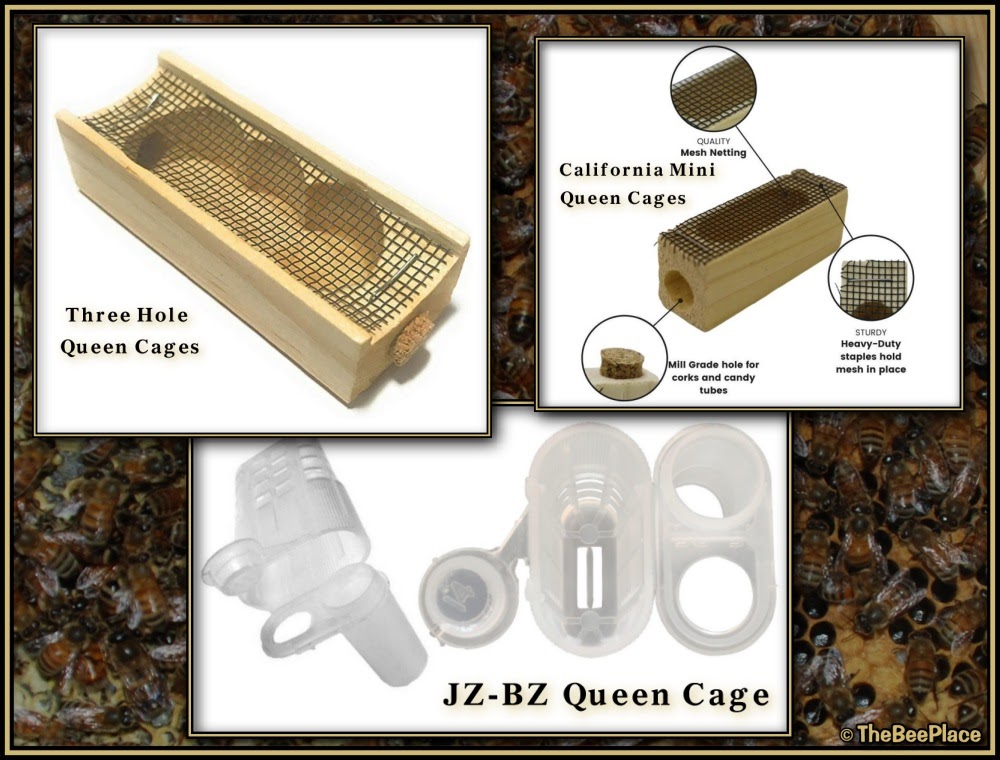
Queen Cages
Here are three of the most common queen cages: JZ-BZ plastic cages, three-hole wooden cages, and California mini cages (my preferred style). There are others, but these are the ones you will most often see.
They all serve the same basic purpose—protecting the queen while allowing worker bees to feed her, keep her hydrated, and spread her pheromones throughout the colony.
This interaction is a key part of the acceptance process.
Some cages use candy tubes for delayed release, while others allow for manual release once the colony is ready.
Regardless of the style, the goal is the same—give the bees time to accept the queen before she is fully released into the hive.
Checking back after a few days is always a good idea to make sure the queen has been released and everything is progressing as expected.
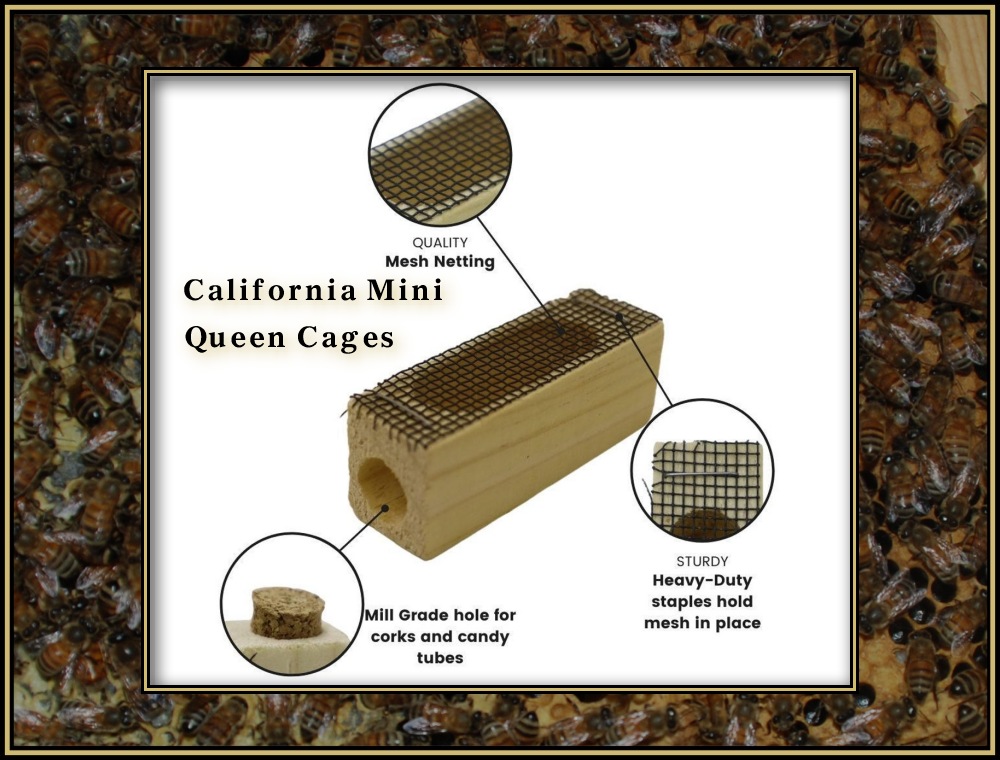
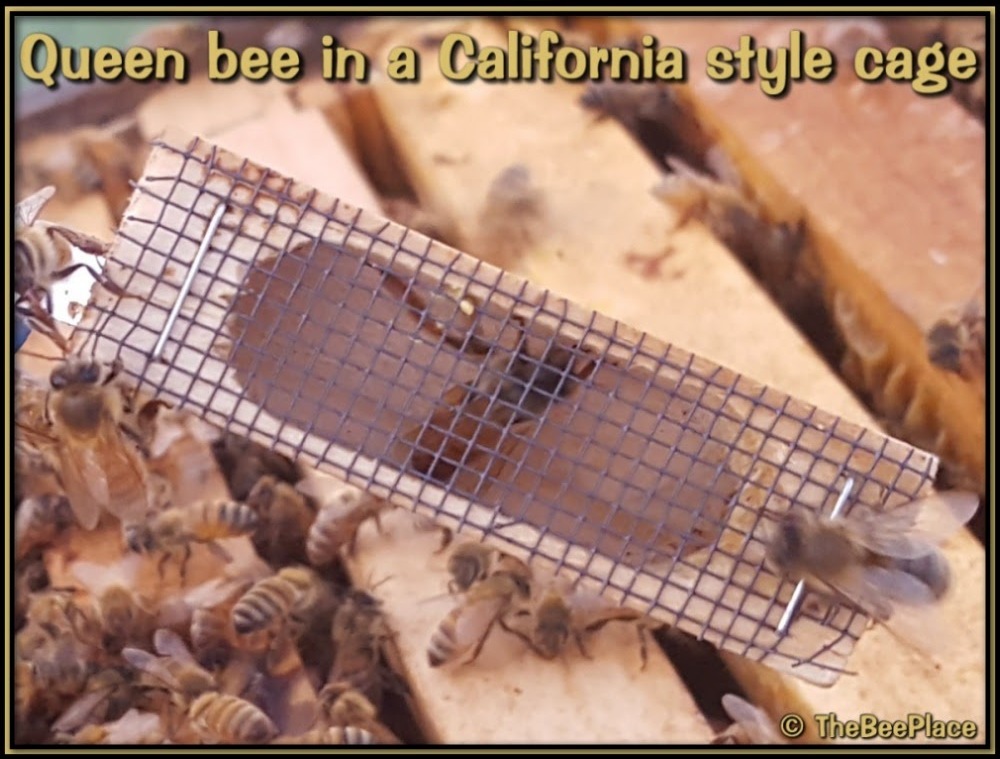
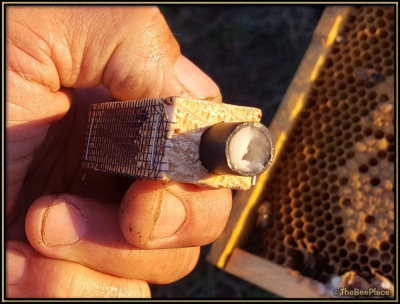
California Mini Queen Cages
These are one of the most common and easiest queen cages to use.
They are designed with a screened section so worker bees can interact with and care for the queen while she remains safely confined during the introduction period.
The small tube on the end can be fitted with either a cork or a candy plug.
A cork allows for manual release when you decide the colony is ready.
A candy plug allows the bees to slowly eat through and release the queen automatically.
Either method works well, depending on your preference.
When placing the cage, make sure the screen is accessible to the bees so they can tend to the queen.
Also ensure the candy end is positioned where bees can reach it so the release process can occur as intended.
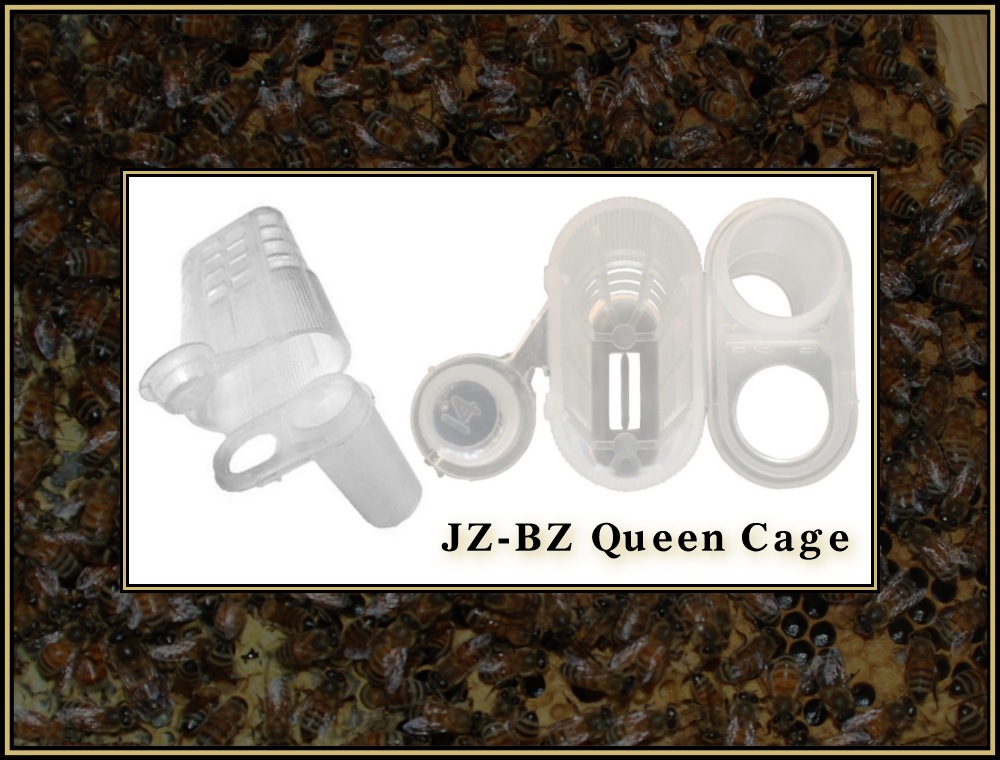
JZ-BZ Plastic Cages
These are a very popular choice for queen breeders and suppliers because of their ease of use and handling.
They can be pressed directly into the brood nest area between frames without blocking ventilation, allowing bees access from multiple sides to care for the queen.
This is the style cage shown in the video at the top of this page.
Placing the cage on the top bars is a quick way to observe how the colony responds to the queen’s presence. If the bees are calm and attentive rather than aggressive, it is a good sign they are ready to accept her.
These cages often include a larger opening and built-in candy tube, making both delayed and manual release options easy to manage.
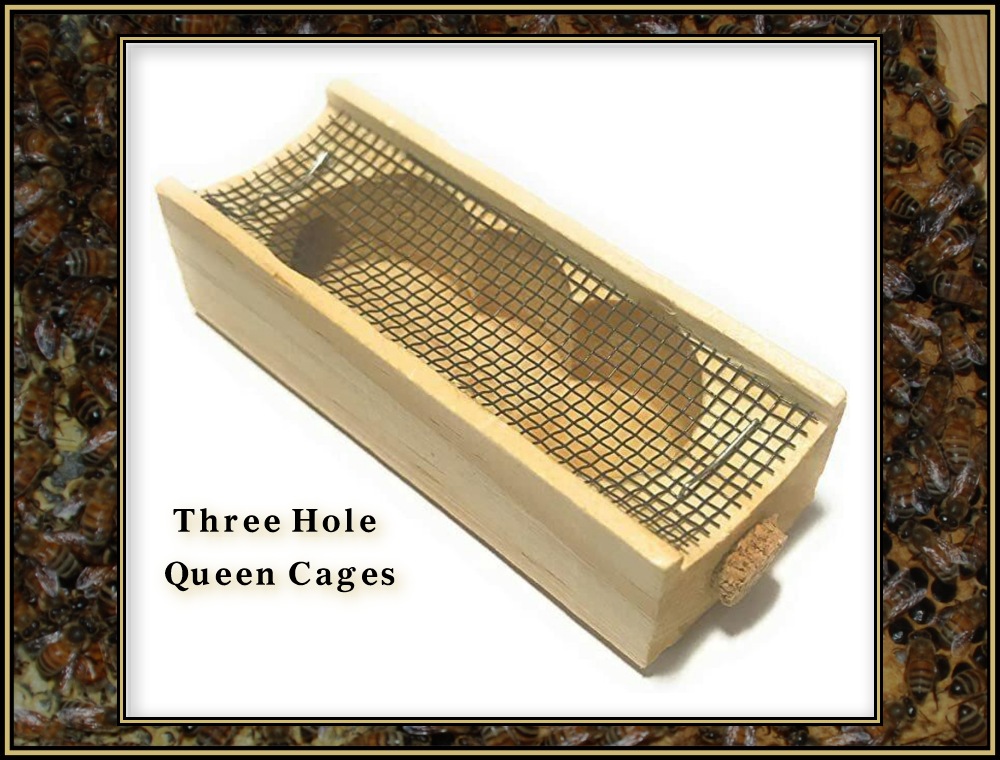
Three Hole Wooden Cages
These are a traditional style cage and are still commonly used.
They typically have two screened sides for worker access and a center hole that can be fitted with either a cork or candy plug.
As with all cages, proper placement is important so bees can reach and care for the queen during the introduction period.
They work well when used correctly but may require a little more attention compared to some of the newer cage designs.
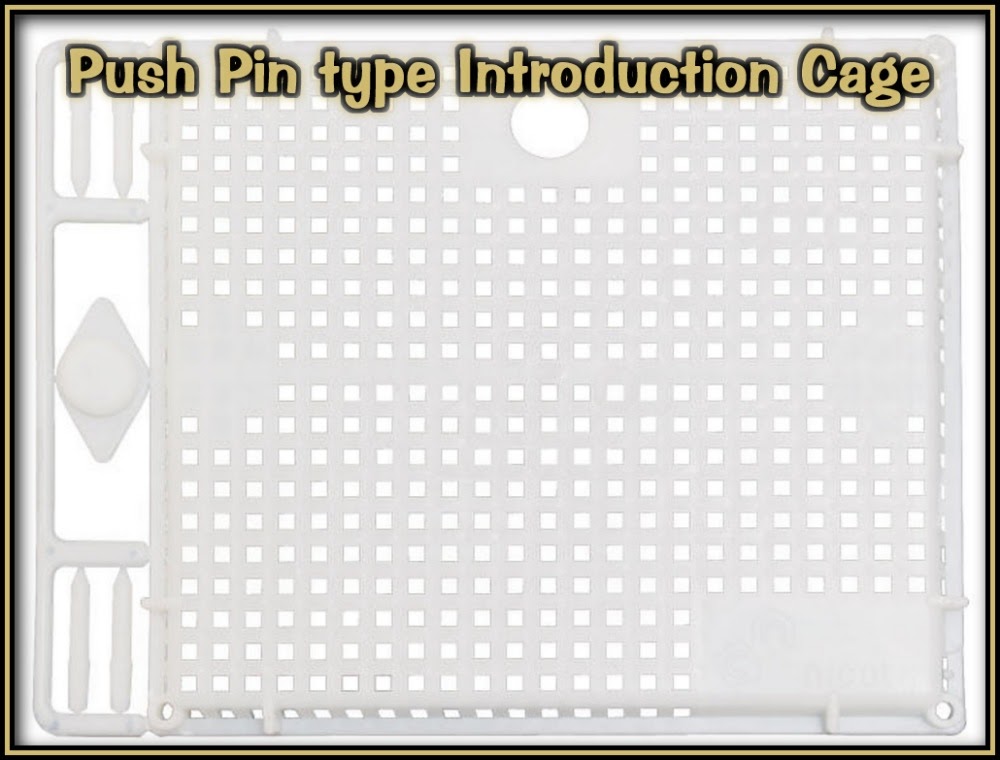
Manual Introduction Cage
aka "Push Pin" type Queen Introduction Cage
This method is typically used for more difficult situations or when a slower, more controlled introduction is needed.
The cage is placed directly over comb and secured with push pins, confining the queen to a small area where she can begin laying while protected.
For best results, place the cage over open comb with some capped brood about to emerge. This allows young nurse bees to emerge under the cage and begin caring for the queen.
This helps spread her pheromones through the colony and improves acceptance.
This method takes a little more time and effort but can be very effective when standard introduction methods are not working.
Positioning the Queen Cage
Once you understand how the cage works, proper placement becomes important.
The images below show how the cage is positioned directly into the comb and pressed into the wax, so it stays secure and allows the bees full access to the queen through the screen.
Select a frame from within the brood nest area, typically near the center of the hive.
This is where the nurse bees are concentrated and where temperature and conditions are most stable.
Placing the queen here ensures she is properly attended, fed, and kept within the natural climate control of the colony.
The candy tube is best be positioned facing upward or horizonal.
- This position safeguards against any dead bees from blocking the exit in the event a bee crawls inside and does not get out.
- If a worker bee enters the cage and cannot find its way back out, it may die inside.
- If the tube is facing downward, gravity may take a dead bee down and cover the hole, which then can block the queen's only exit.
- Pointing the candy upward allows gravity to keep the exit clear.
Make sure the screened portion of the cage is fully accessible to the bees.
They need to be able to reach the queen to feed her, hydrate her, and begin spreading her pheromones through the colony.
The goal is simple:
Secure the cage in the brood nest, give the bees access, and let them do the work.
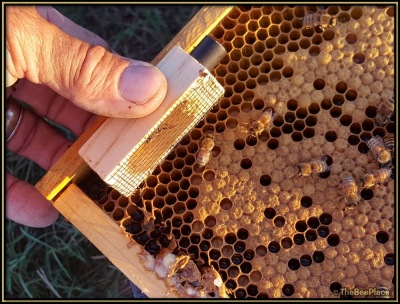
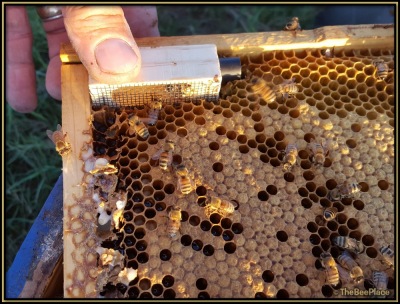
The images above show the candy and exactly what the process should look like.
